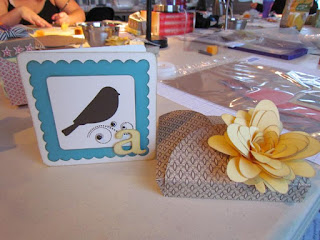
 Every year, I host a Christmas party for my Memories in Motion team. This year, I was running a little behind, but we still managed to squeeze our get-together in! What I LOVE about this event (besides spending time with some really awesome ladies), is that we have a handmade gift exchange, and all the gifts feature Close to My Heart products. Not only is the swapping (and stealing) FUN, but we get some great project ideas for the upcoming year. These projects really reflect what being a Close to My Heart Consultant is all about--sharing what you LOVE with others! So, let's share. . .
 This album was made by one of our brand new Consultants, Kathy Smith. Not bad for a newbie, eh?!!! My photo doesn't even begin to capture the beautiful embellishments Kathy put on this book. Her book was inspired by Tresa Black's Fabulously Arsty blog.
 Gwen Fillinger made this adorable Christmas album. What you can't see in the photo is that each page folds out. Gwen got this ideas from splitcoaststampers.com -- look for "flip book."
 Patricia Ervin made this spiral mini album. She used the stamp set from our Rock the Block special to stamp all of the cute images in the book.
 Sandee DePriest made this JOY banner using our My Creations Banners. The embossing and embellishments were really pretty!
 Pam Mosier made this album using Typeset paper. Again, what you can't see is that pages fold out in a really nifty way.
 Jan Jackson made this card holder full of cute Chistmas cards. It's actually made to hold smaller cards (which would allow you to tie it shut at the top), but Jan filled it was some really cute standard-size cards.
 Rhonda Leeper made this adorable paper tree using papers from the Sophia paper pack. You can get instructions from splitcoaststampers.com (look under Resources for Paper Tree).
  Okay, this wasn't technically part of the gift exchange, but I thought I'd show you this album that Sandee DePriest created using our My Creations banners. Sandee did a class demonstrating several great ideas for how to use the My Creations banner, and this was one of the projects.
  Diane Meinhardt made this "Stack the Deck" album based on an idea she got from splitcoaststampers.com. She used envelopes, and each page is like a pocket.
  Suzanne Thomas made this beautiful cookie sheet magnet board featuring the Sonoma paper. She used spray adhesive to attach the papers to the tray. I love how she embellished the magnets and clips!
 I made this project at the Scrapbook Spa Getaway, and it was fun to get to share it with one of my team members. There's a piece of sheet metal attached to the front of the wooden piece so that the magnets will stick to it. The calendar pages are printed on the computer and are held to the board using the magnets.


